
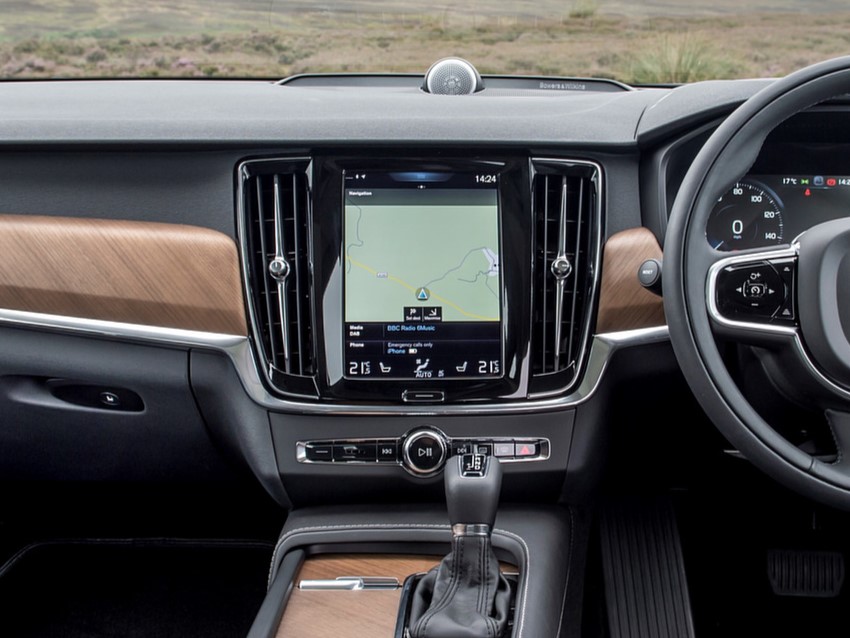
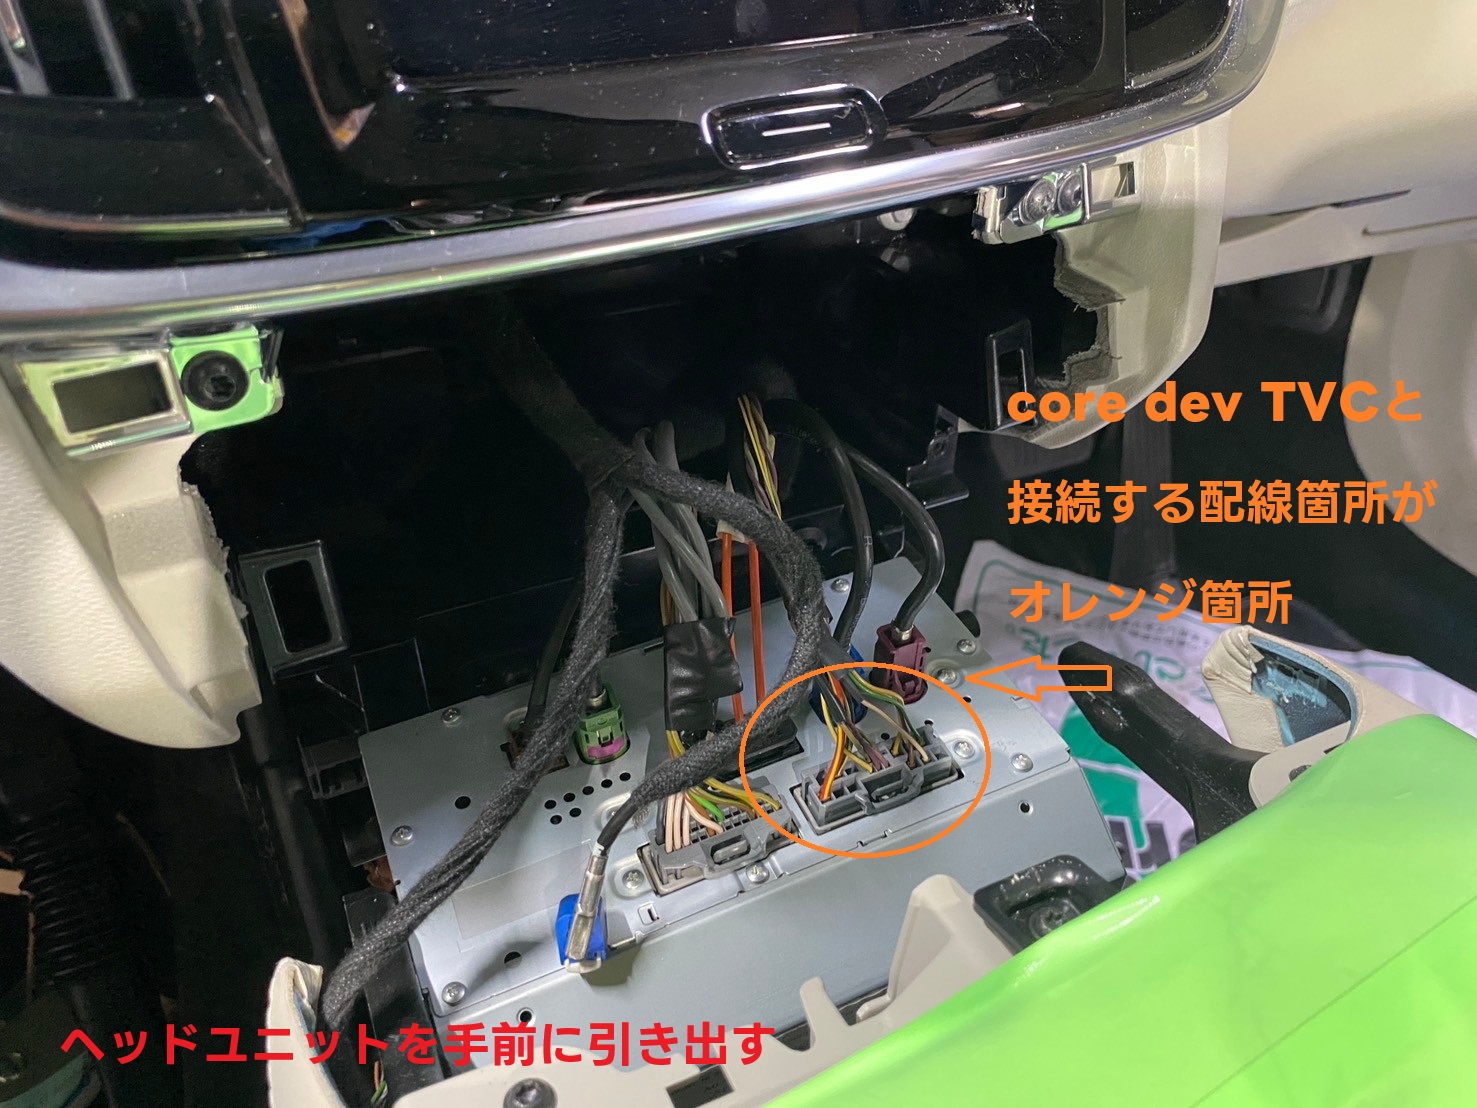
VOLVO Sensus Navigation 搭載モデルにおける、純正TV/ナビキャンセラー「core dev TVC for VOLVO Sensus Navigation 9inch」(CO-DEV2-VL02)を取り付ける際の、ヘッドユニットまでのアクセス方法をご紹介いたします。
取り外し手順の該当車種
Volvo 純正ナビゲーションSensus Navigation 搭載車
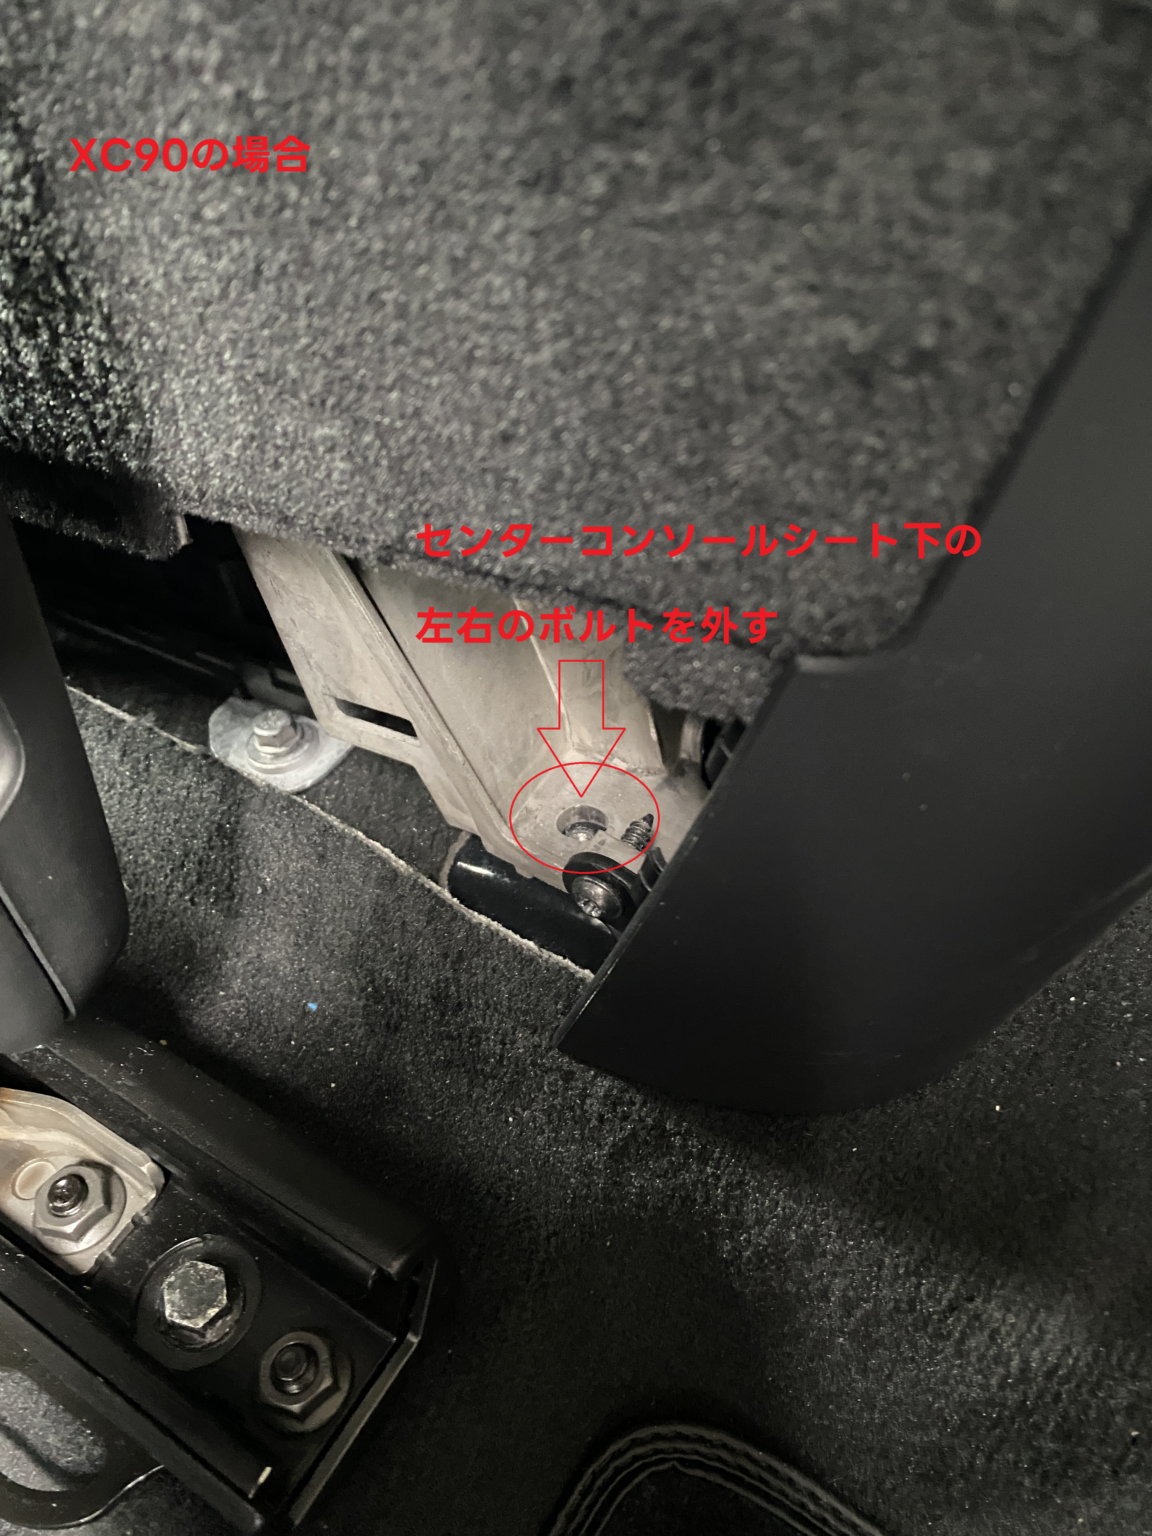
- XC90(MY2017~)
- XC60(MY2017~)
- V90(MY2017~)
- V60(MY2019~)
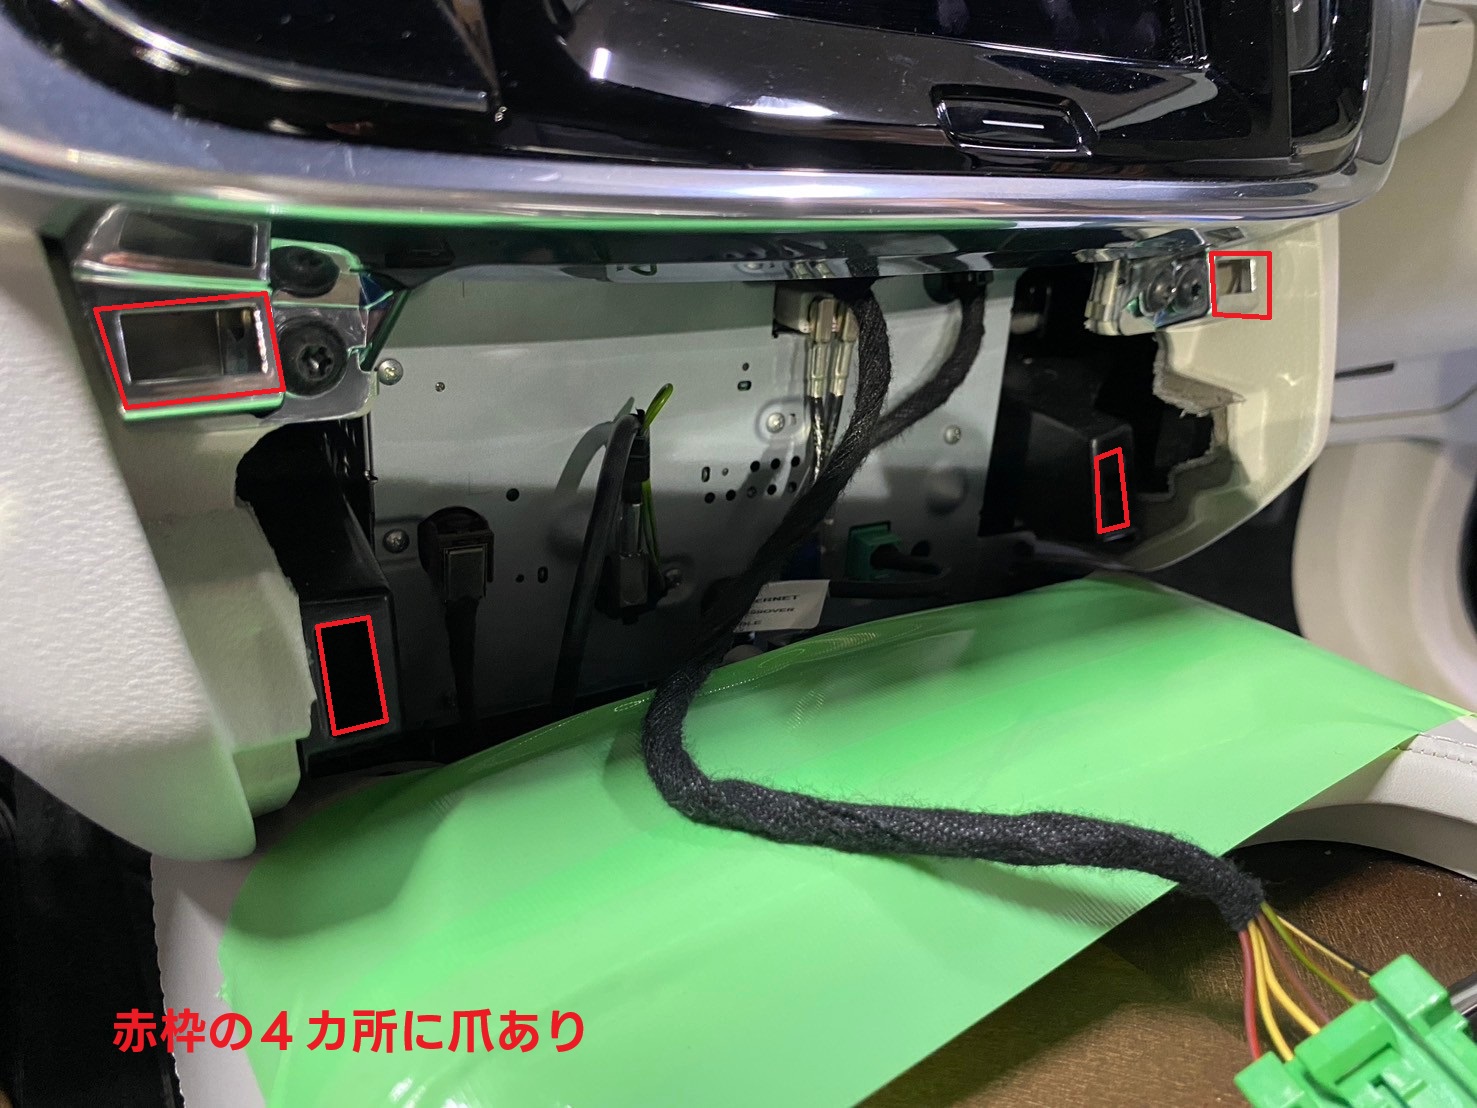
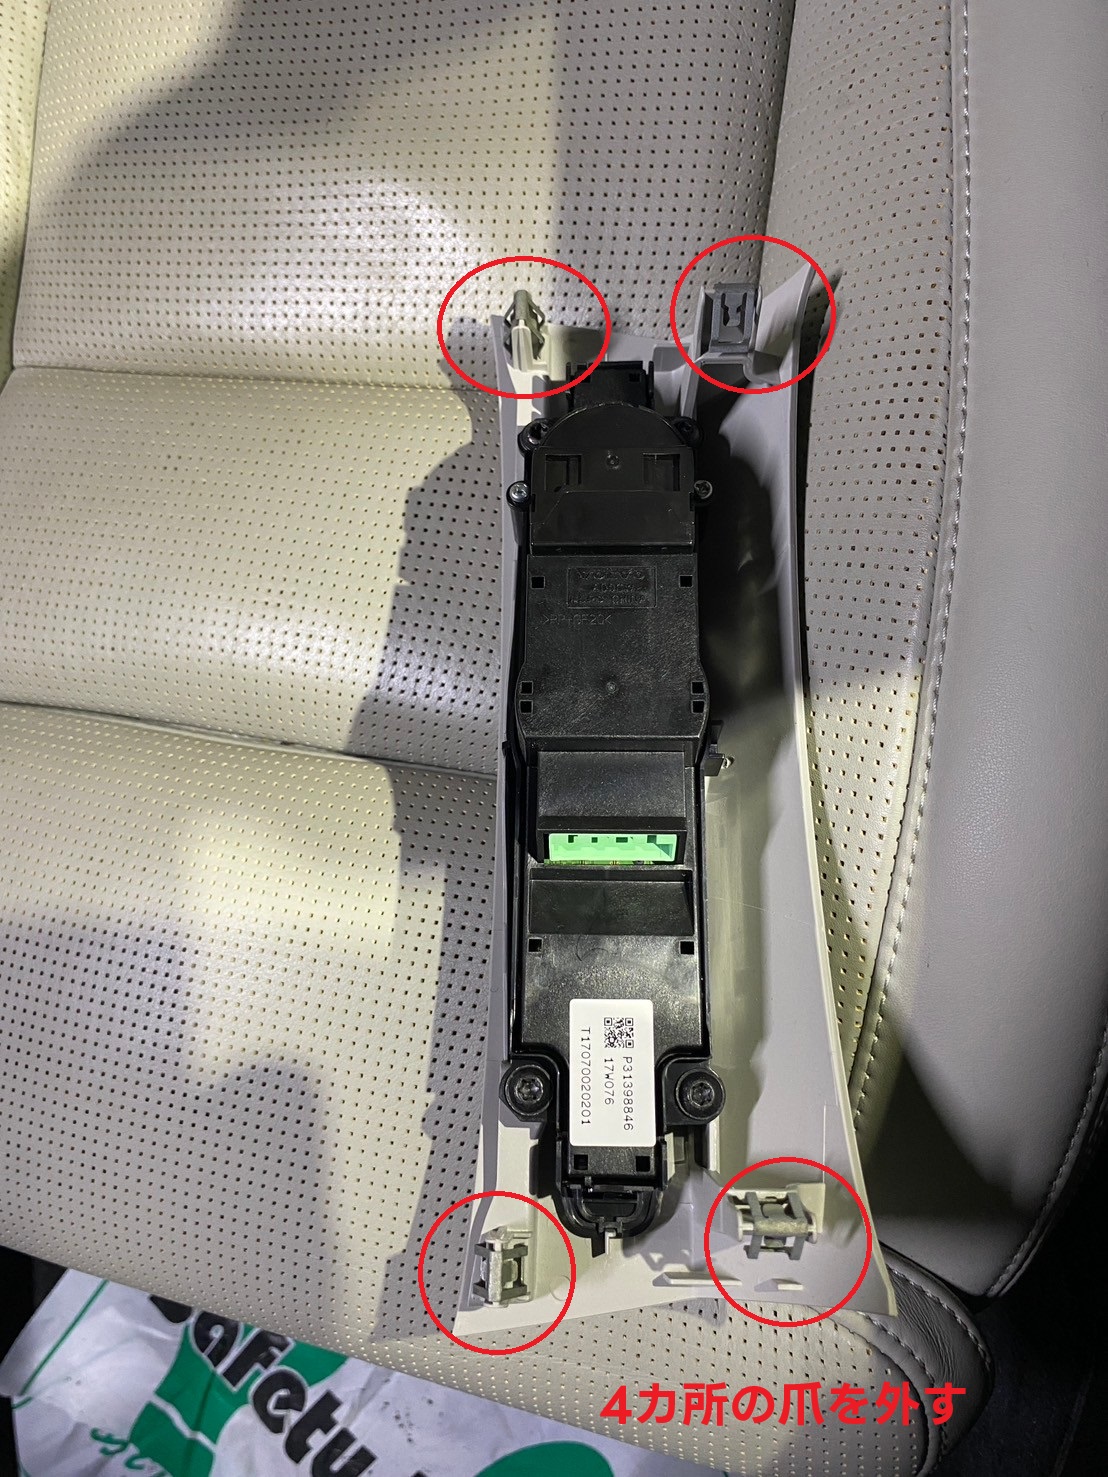
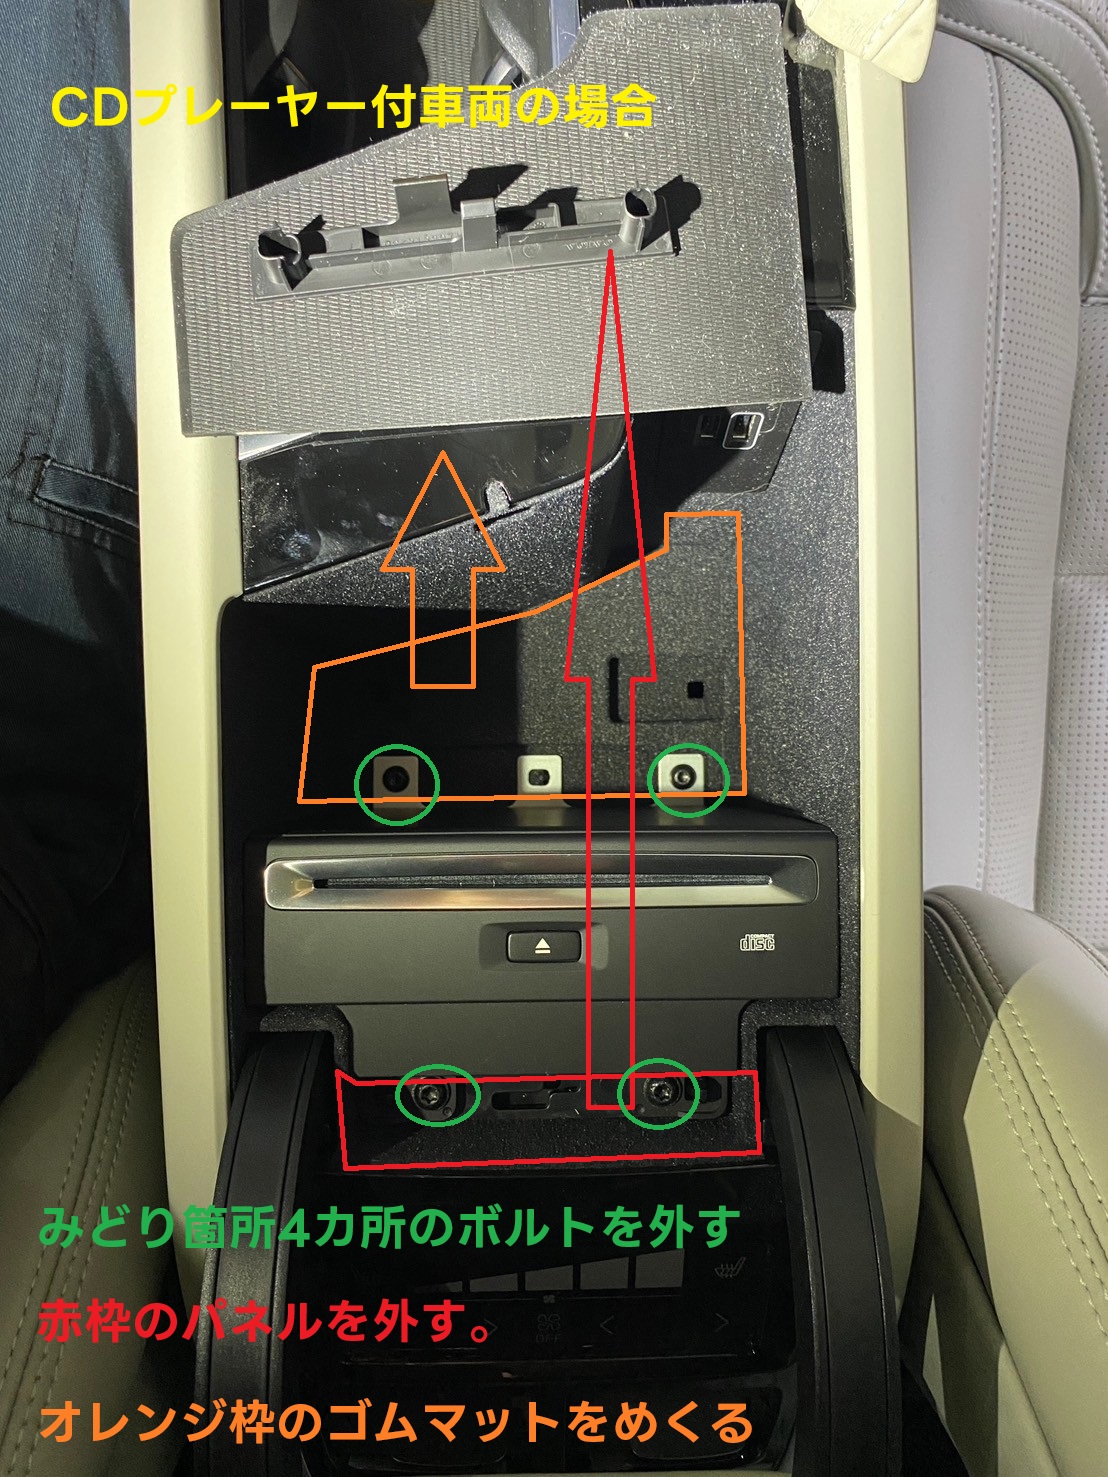
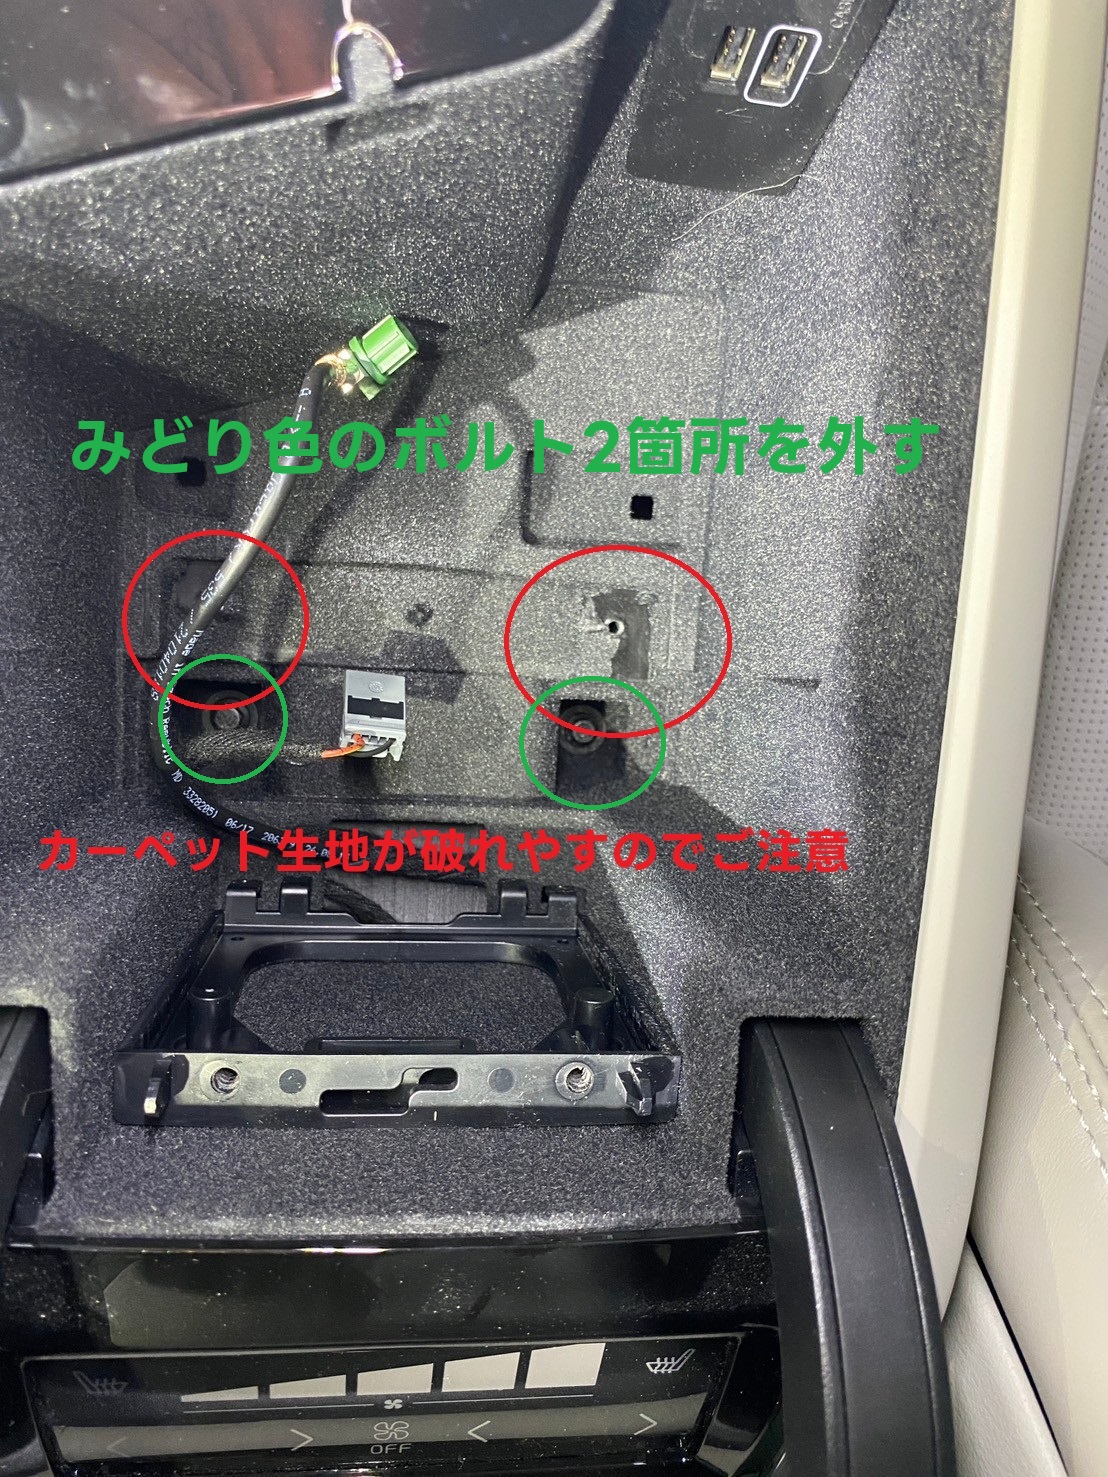
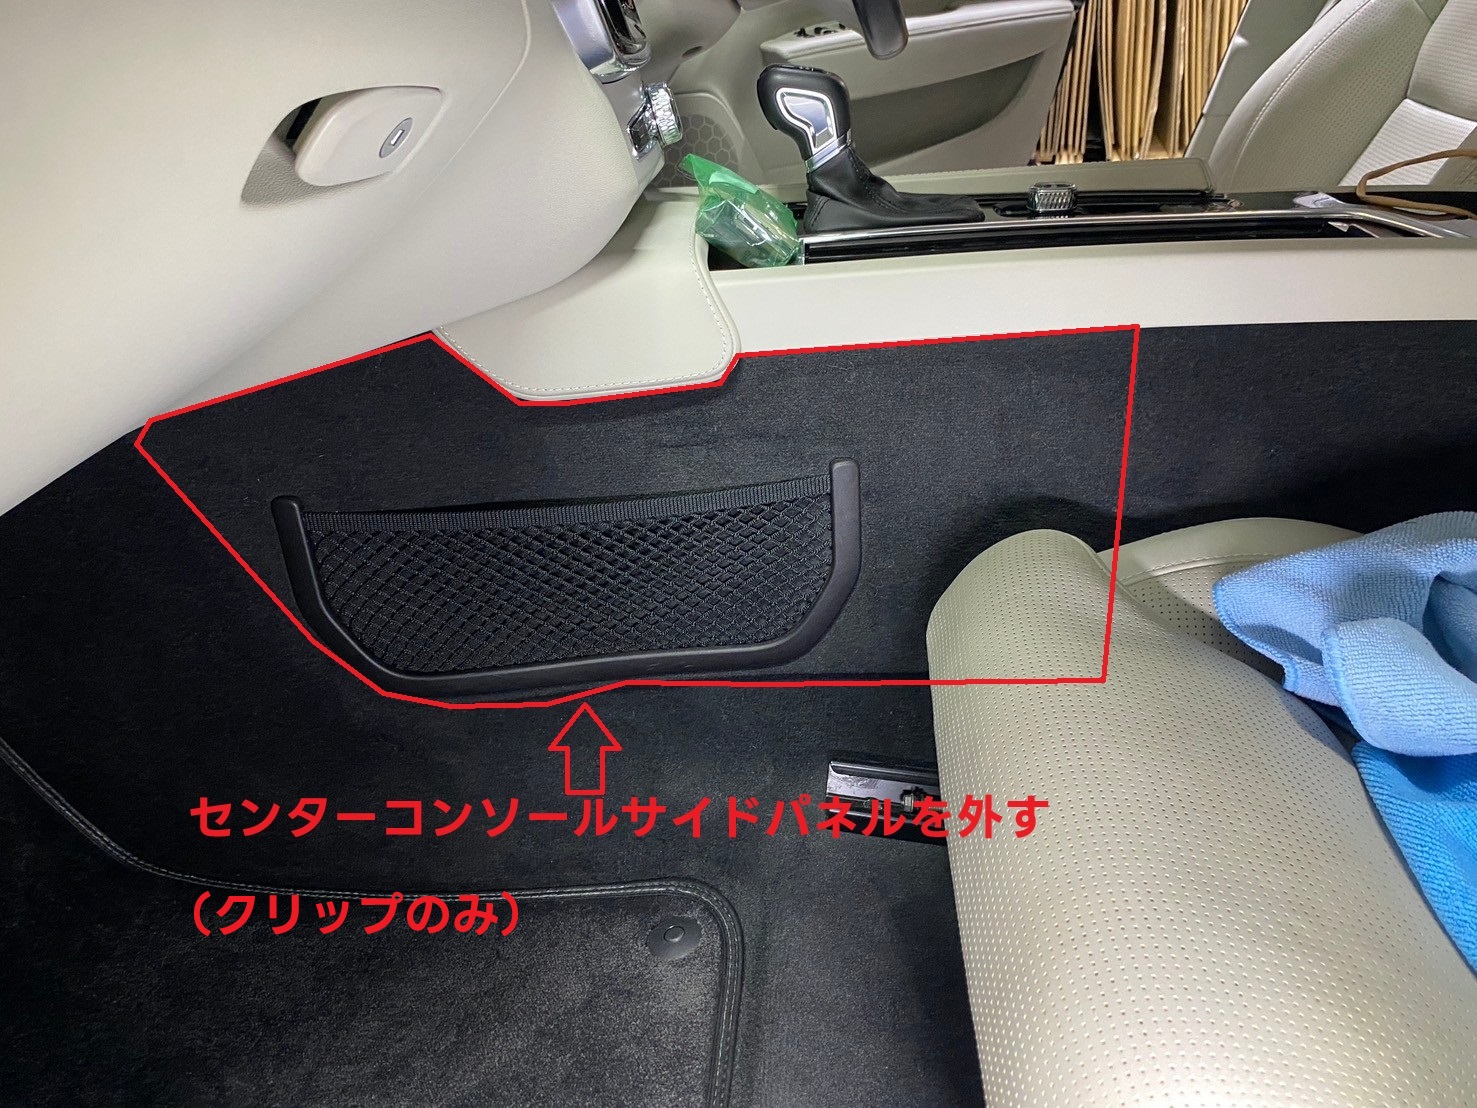
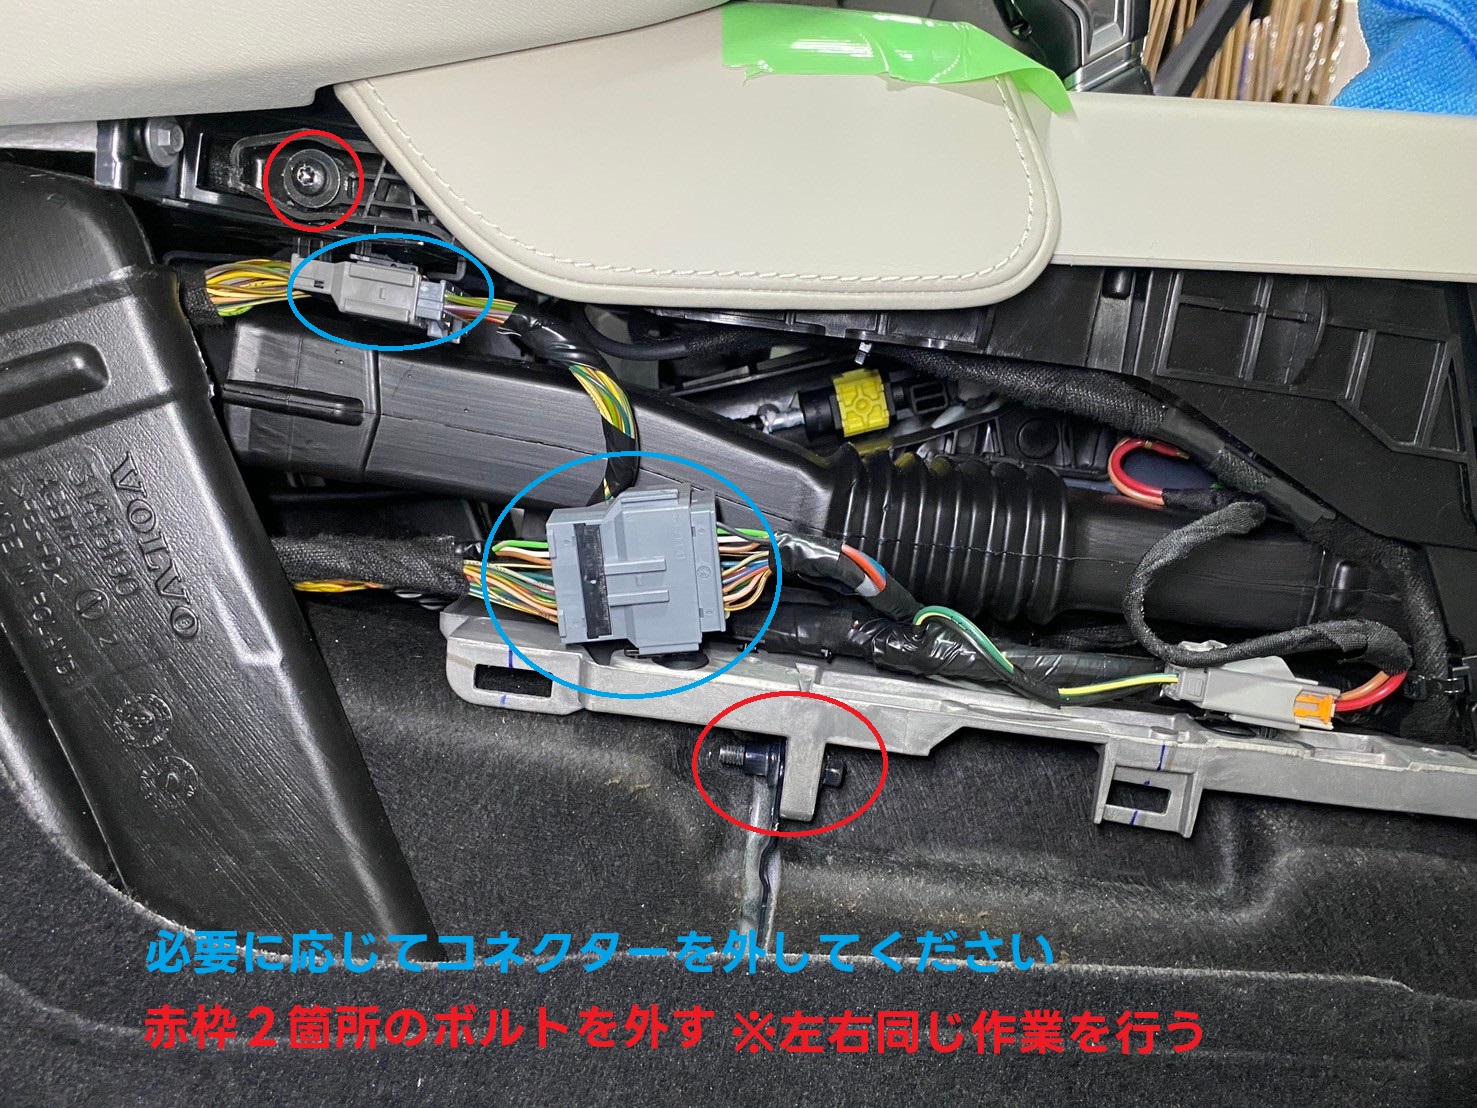
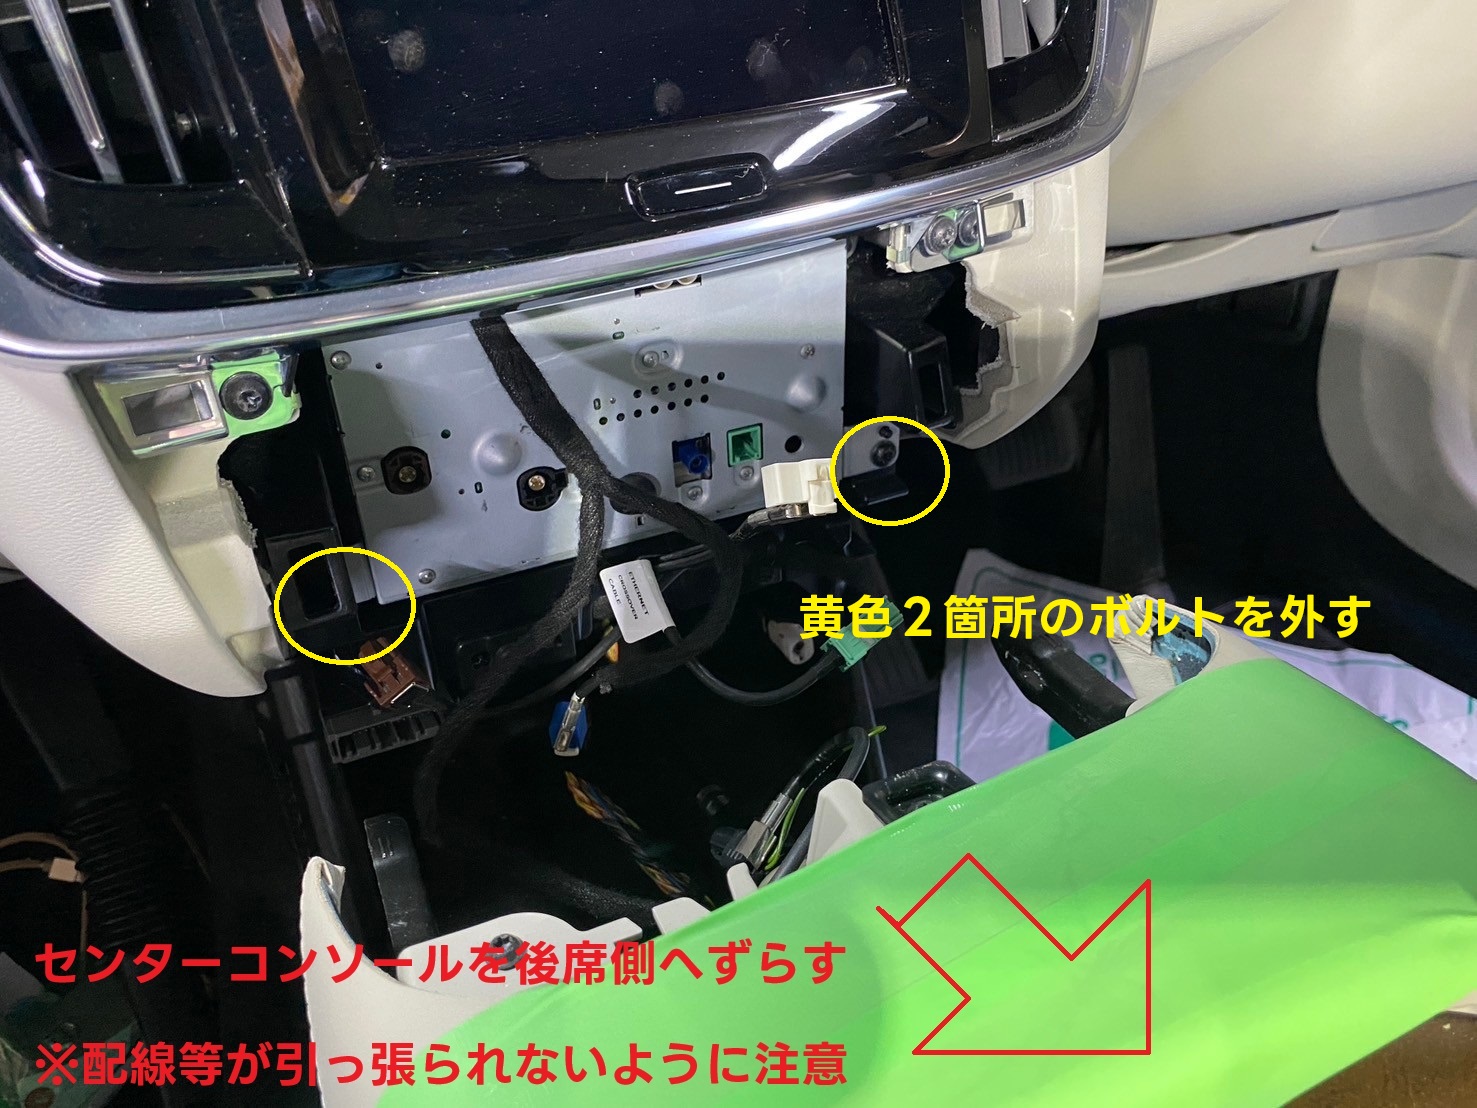
取り外し手順
写真はVolvo V90 MY2017となります。
V40・XC40・EX30を除きすべての車両が同じ手順となりますが、車種、モデルイヤーによって細部が異なる場合もございます


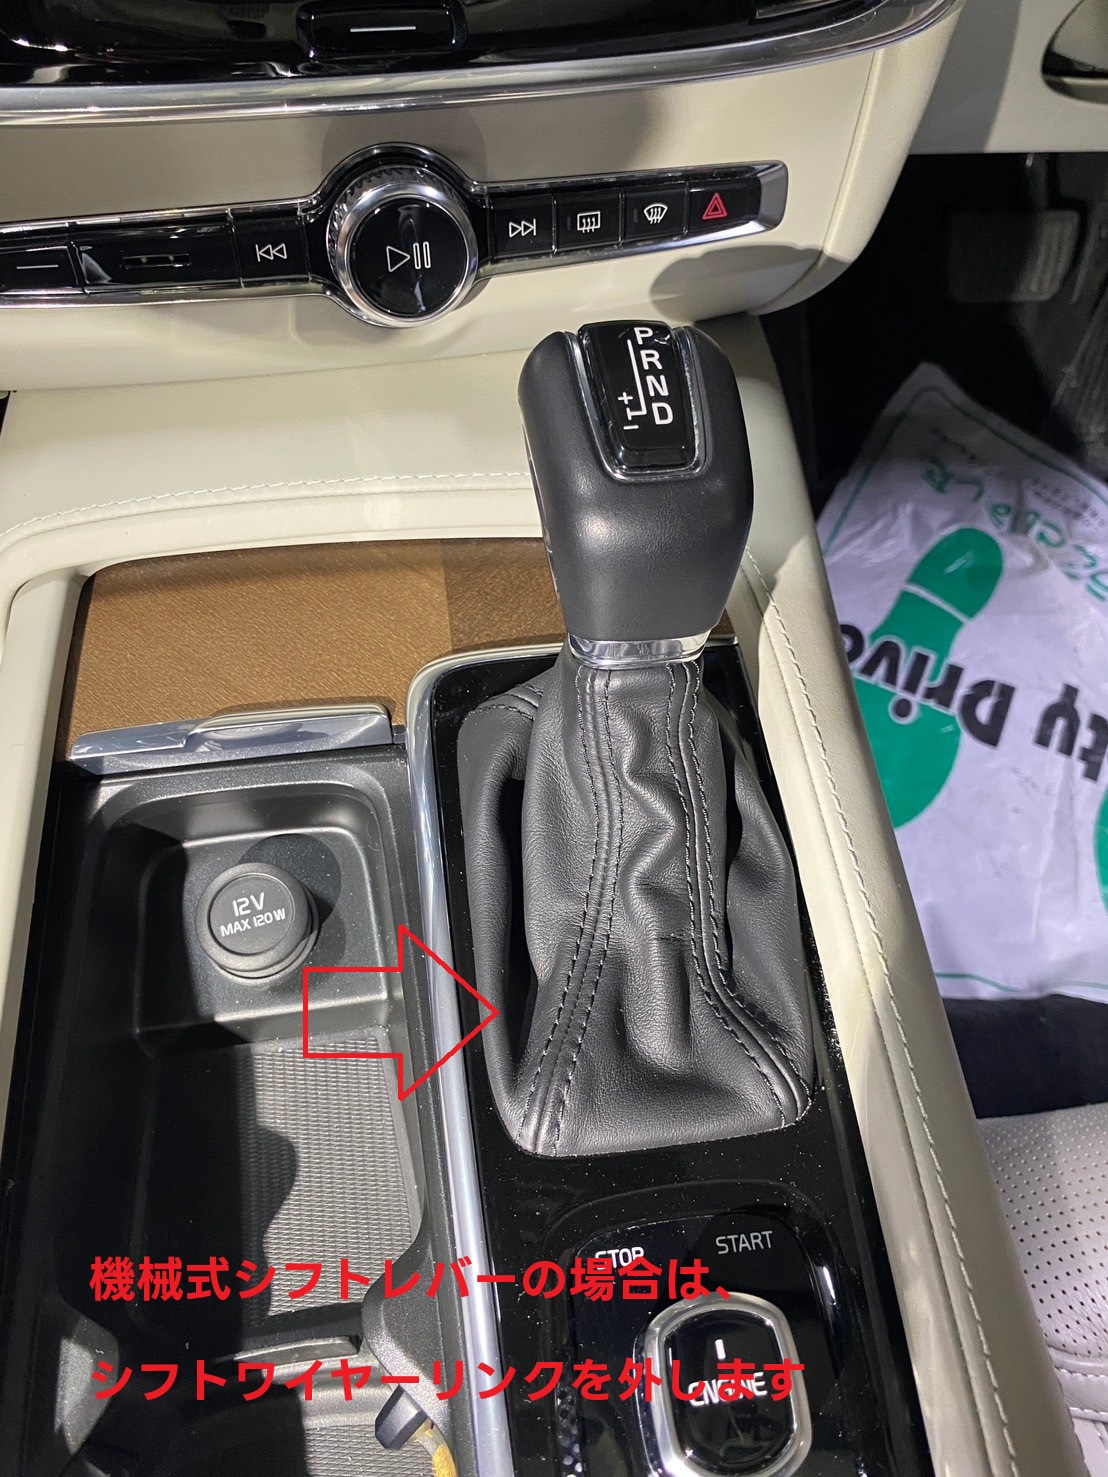
電子式シフトノブの場合は次の工程をご確認ください
電子式シフトノブの場合は次の工程をご確認ください
電子式シフトノブの場合は次の工程をご確認ください
電子式シフトノブの場合は次の工程をご確認ください
備考
- 作業する際は写真を元に現車を優先してください
- DIY作業用の解説写真ではございませんのでDIY作業のサポートは行っておりません
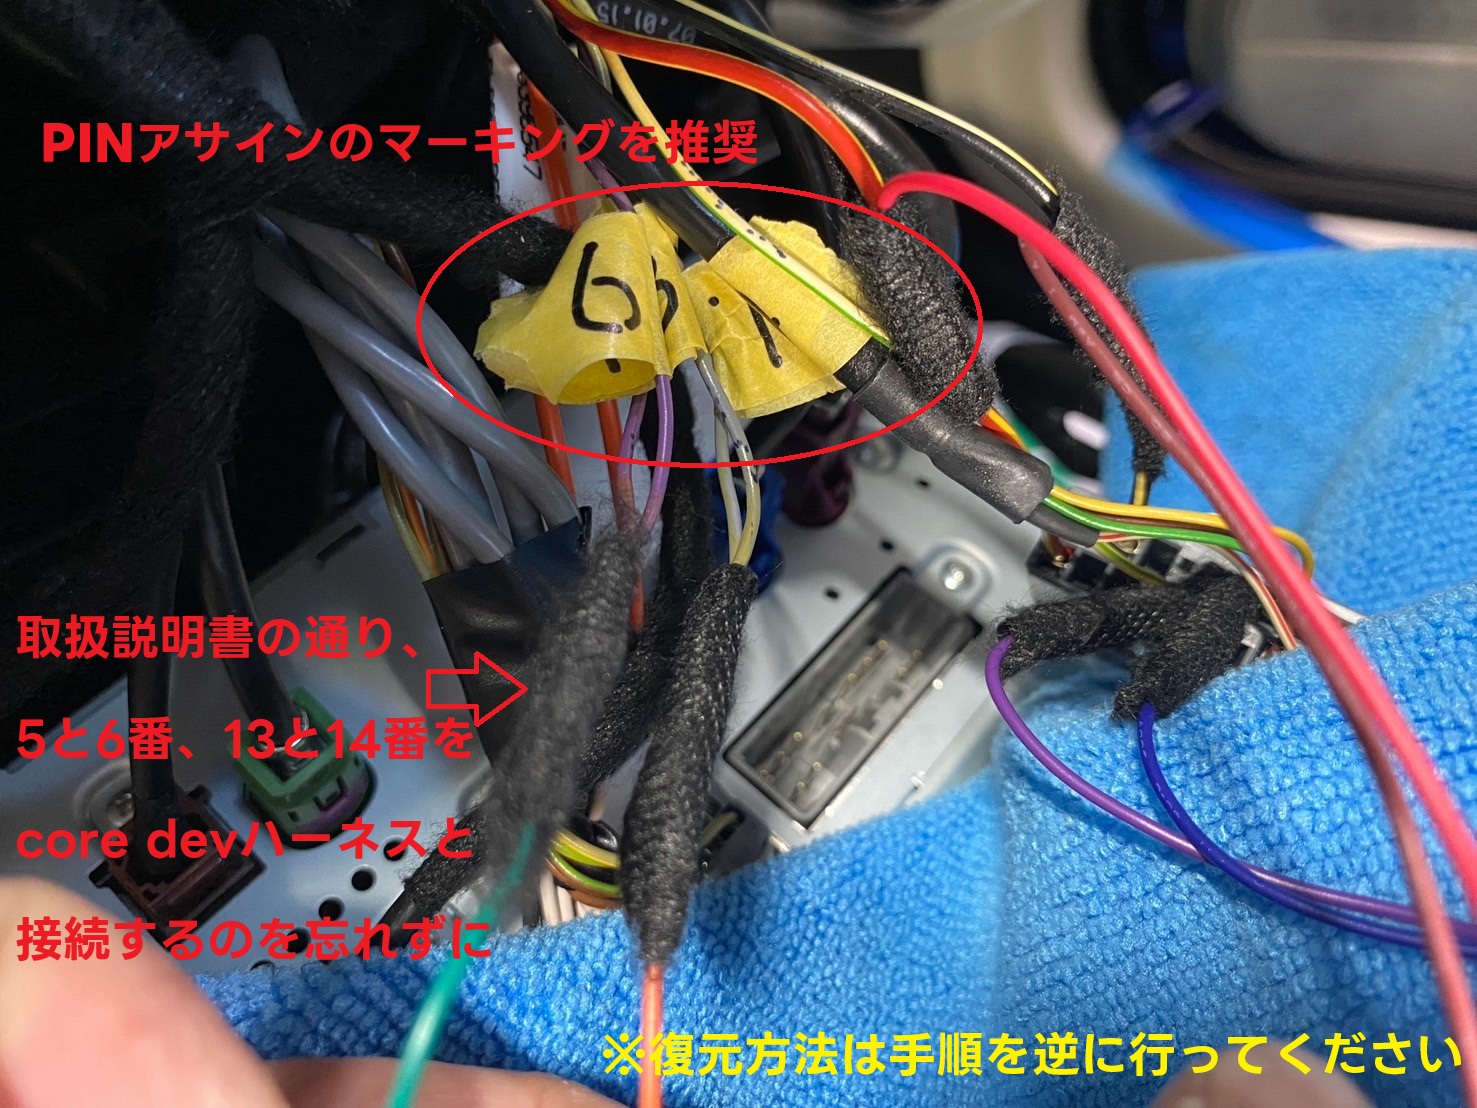
- 配線の接続方法は製品付属の取扱説明書をご確認ください
- Googleナビ搭載車はこの写真通りではございません
- XC40とEX30はこの写真通りではございません
リンク集
- コードテックCAM Webページ
- PLUG CONCEPT!
- core OBJ
- オンラインストア
- Facebook コードテックCAM PLUG CONCEPT!
- Instagram コードテックCAM PLUG CONCEPT!